How Can We Help?
How to Create and Process a Pay Run
Once you have created an organisation and created the employee profiles you will be ready to create and process a pay run.
You are presented with the below screen when you first log in. Click on the dashboard box under the actions to the right of the screen (highlighted in yellow below).

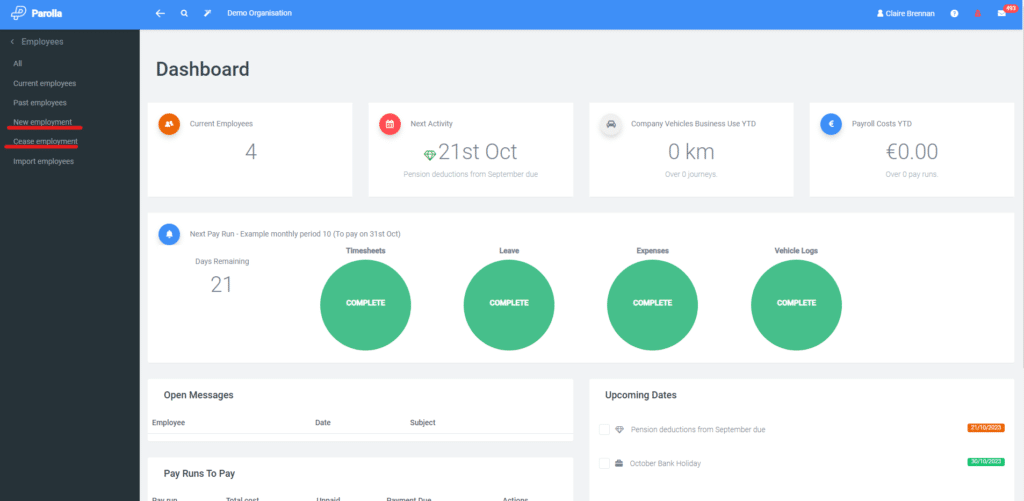
Make any updates prior to opening the payrun such as adding new employees or ceasing leaving employees.
Create a pay run
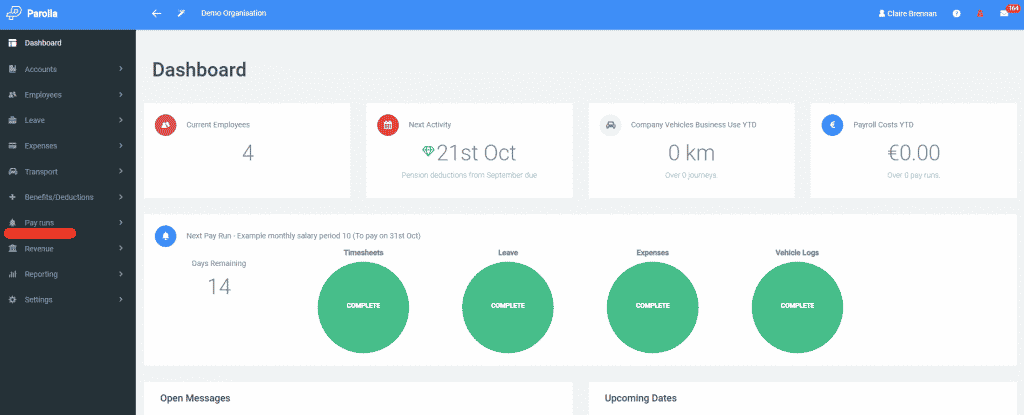
The menu now appears to the left of the screen. Click on the bell pay runs icon and choose the pay run you wish to create.
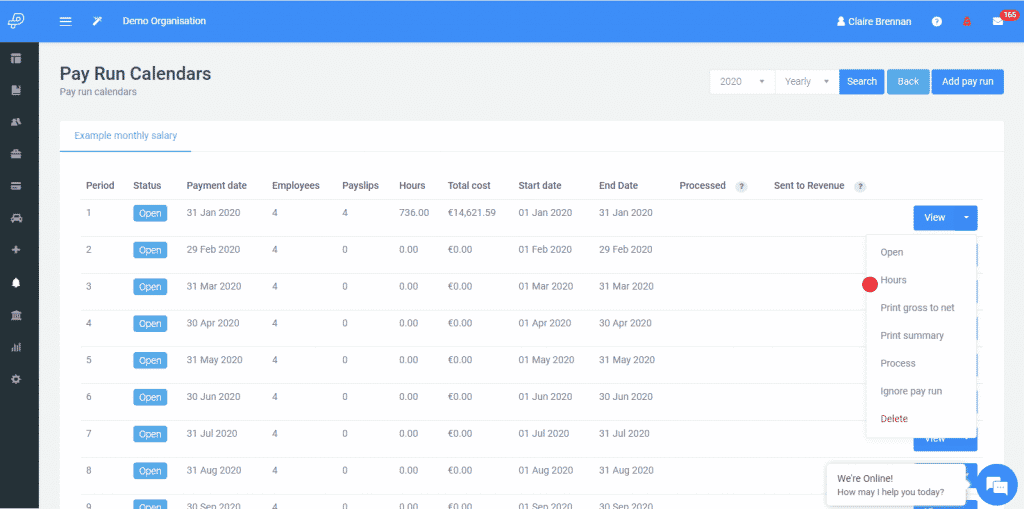
Click on View to move directly to the pay run. Click on the arrow key next to view and choose View or Open if you have set up a salaried (non-variable) payroll. If you have waged employees click on the Hours option if you need to insert hours/update rates as per below.
Inserting hours
Once you have inserted the hours/rates, click on the green button to view the pay run.
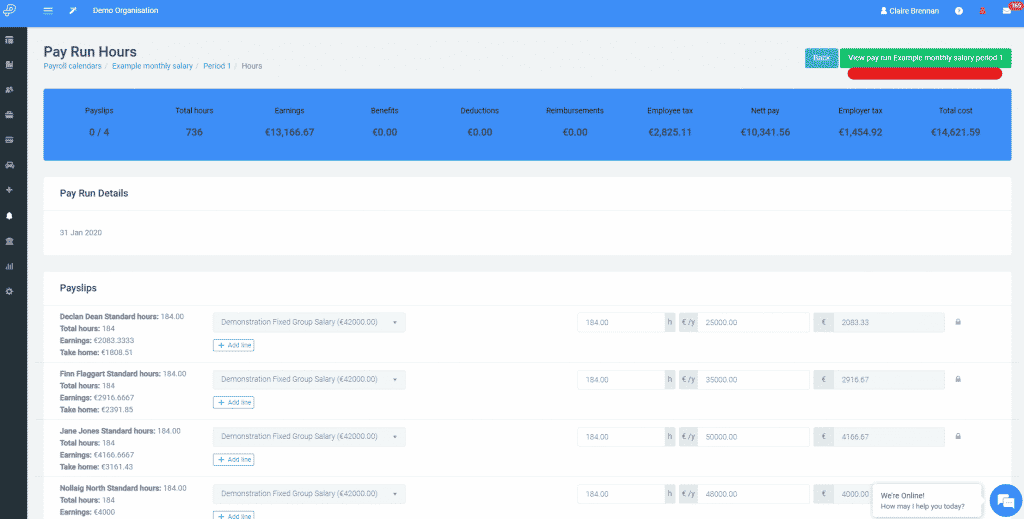
Viewing payslips
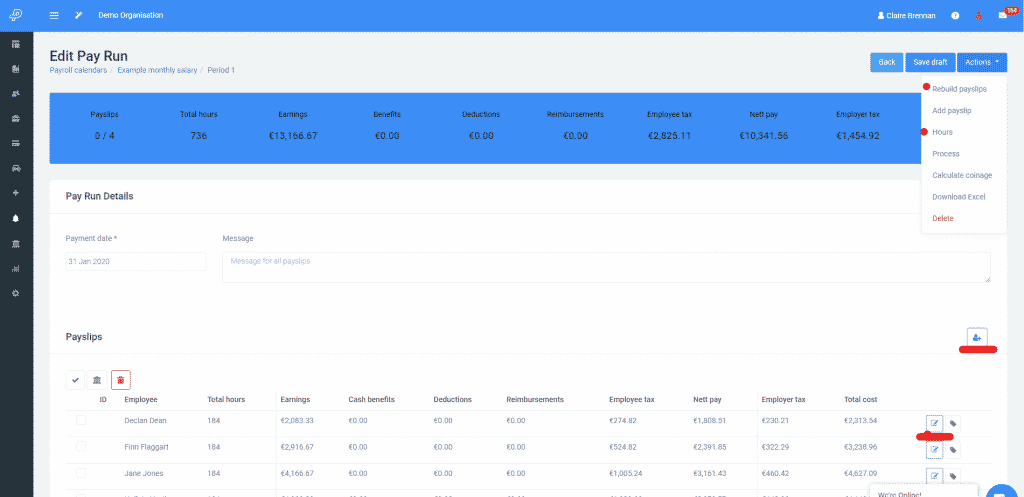
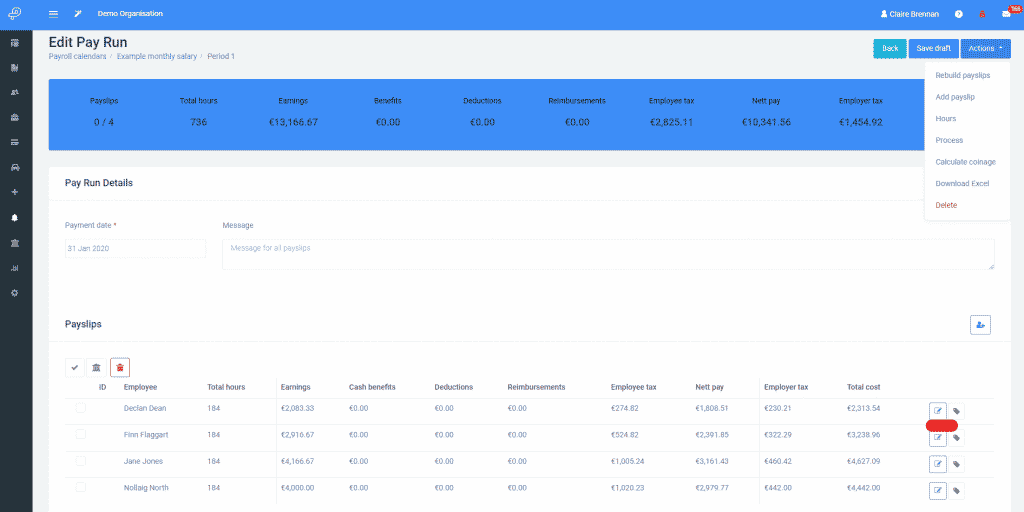
To view payslips click on View or Open. If you want to view or edit one payslip, click on the edit button to the right of a person’s name.
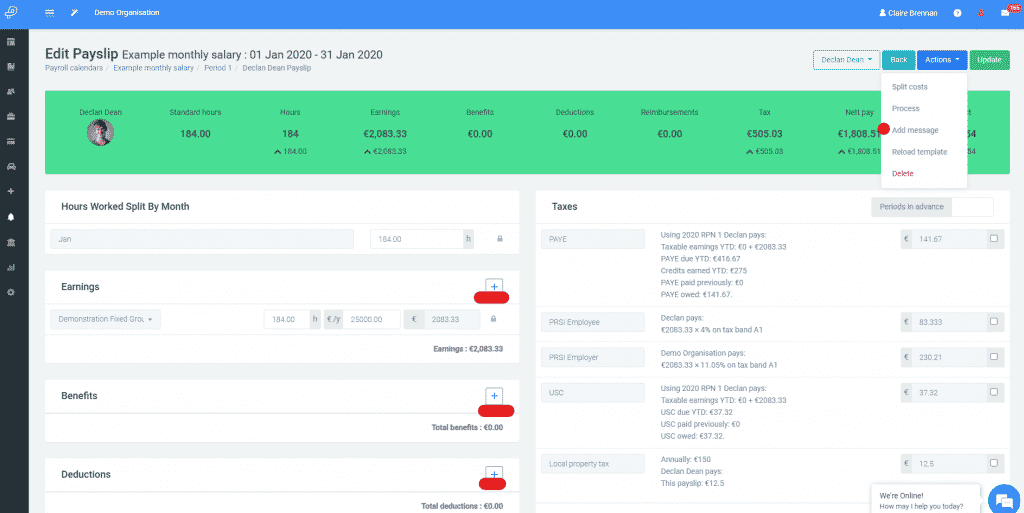
You can then view the payslip in full and add any earnings types or reimbursements directly to the payslip. Pensions and Insurances should be set up separately so that they feed into the payslip template automatically. If you have used the leave tab in Parolla, the leave items will feed into the pay slips automatically. You can also add leave items directly to the payslip as an earnings type. **The leave paid out earnings type should only be used when an employee is leaving the company** For normal leave, use the annual leave earnings type.
You can add an individual message to a payslip if you wish.
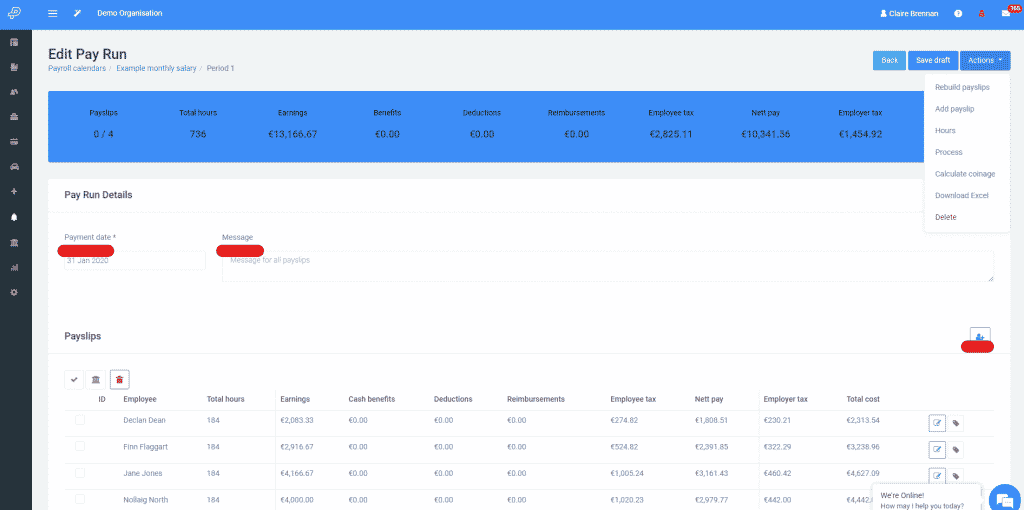
You can update the payment date if required and add a message to all payslips. Delete any nil payslips as it is Revenue’s preference not to receive nil payslips.
Process a pay run
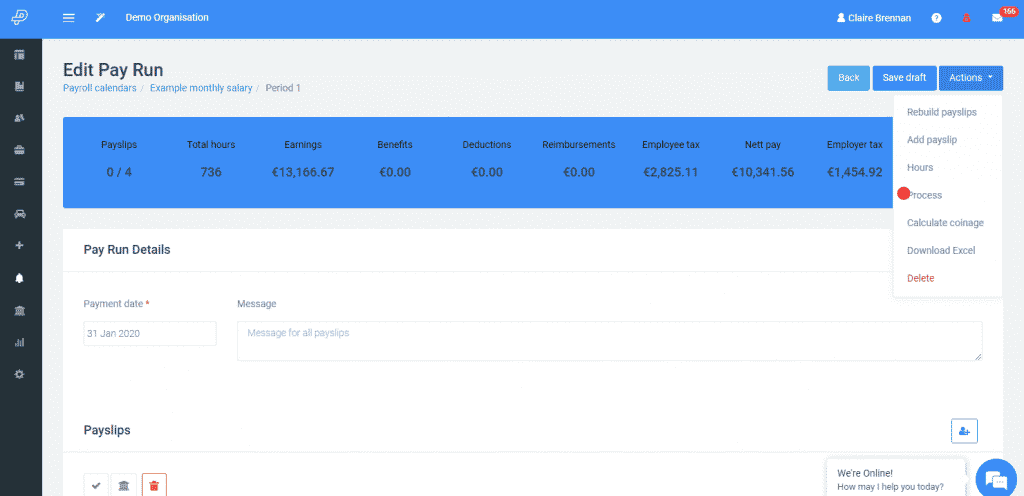
Once you are happy that you have entered all the data, you can process the pay run. Click on the arrow key next to the actions button and choose Process.
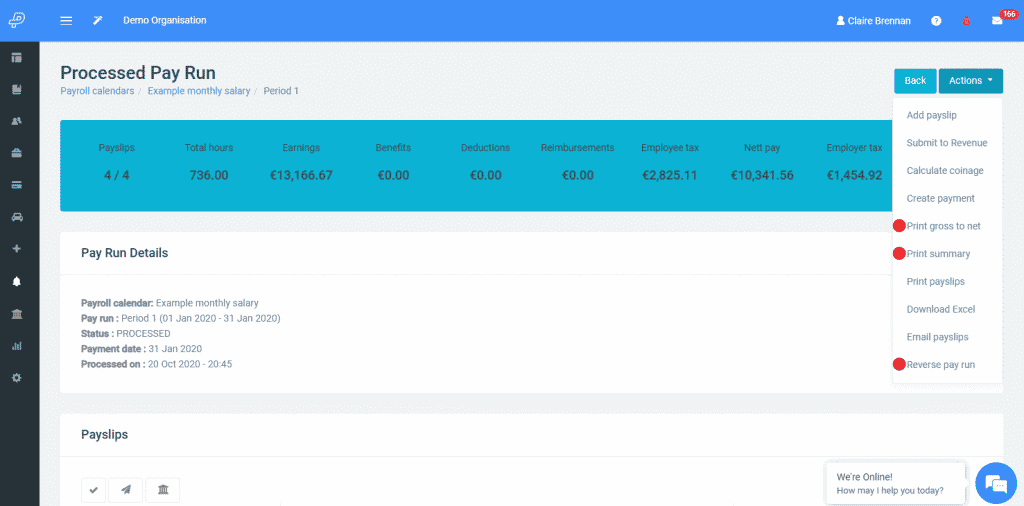
If you haven’t already done so it is a good idea to review the pay run either by creating a Print gross to net report or Print summary. If you have entered hours and wish to cross check the rates/ amounts go to the reports section in Parolla and choose hours detailed report, this will save you lots of time! If you discover an error you can return to the payrun and reverse either the individual incorrect payslip or the entire payrun.
You now have the option to Create payment, Submit to Revenue and Email payslips to the employees.
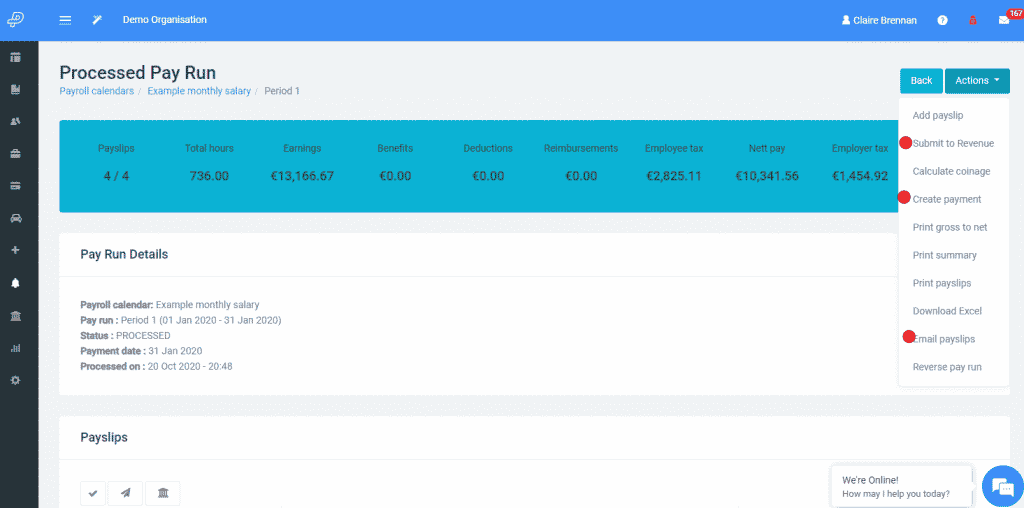
After you have submitted to Revenue you can also check the Revenue status of the submission in Parolla.
Common Issues
If you viewed (built) the pay run previously and subsequently made some changes, such as creating a new employee, then click on Rebuild payslips and the changes will appear. Alternatively, you can choose to add a payslip.
