How Can We Help?
Creating Employee Profiles
Purpose
This document will guide you through creating employee profiles. It follows on from creating an organisation guide where basic employee profiles were imported from the Revenue Payroll Notification (RPN).
Information required when creating employee profiles
- Employee email address.
- Employee role details – Hourly/weekly/monthly rates. Contracted hours.
- Bank details if you intend to pay via SEPA bank file.
Details
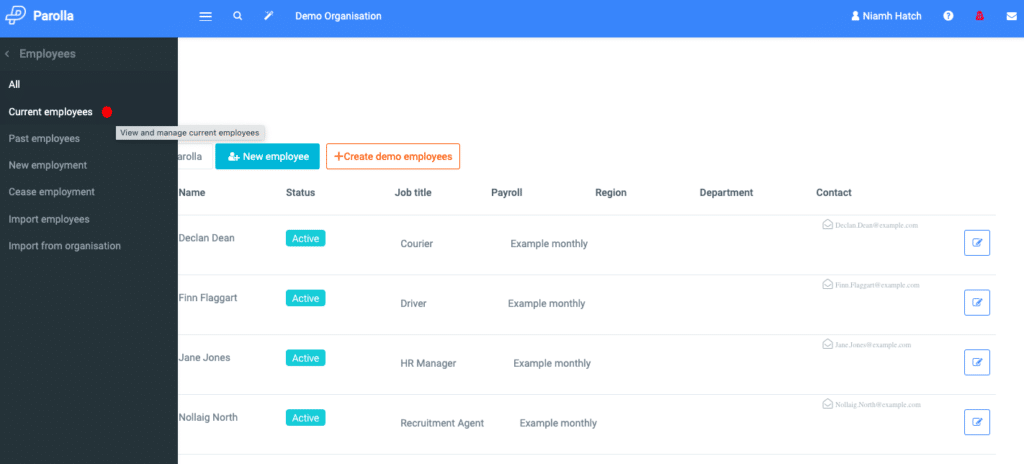
Go to the menu, choose Employees > All/Current employees, and click on the edit button to the right of the individual’s name (follow the red dots below).
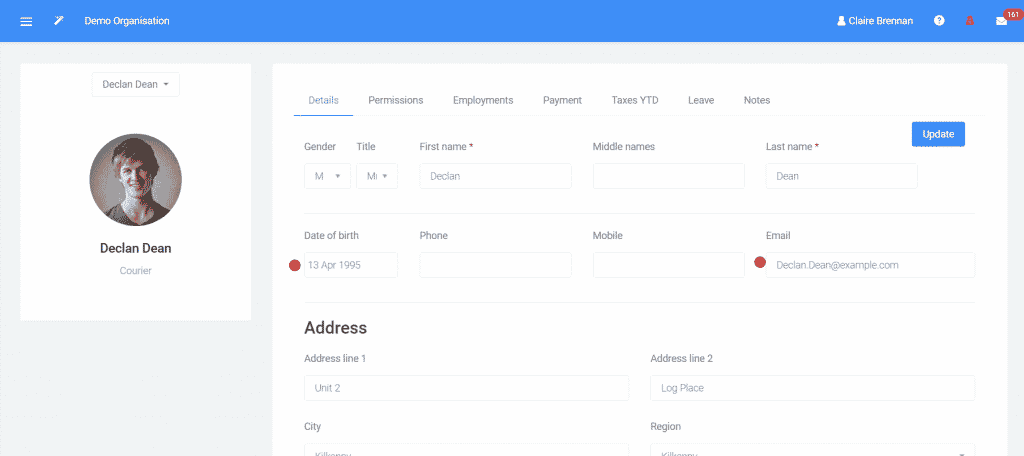
Input the email address so that you can email the payslips.
Enter the gender, and date of birth for all minors or workers over the age of 66 and any employees with a pension.
Permissions
If an employee is a manager and you have set up Regions and/or Departments for you organisation, you may wish to reflect this in their permissions; otherwise, skip to Employments.

Employments
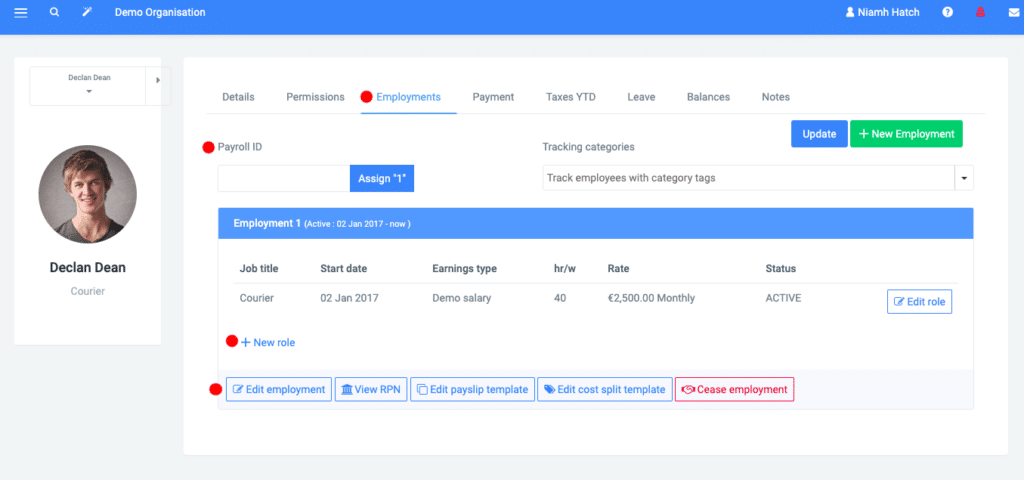
The Payroll ID is the company payroll identifier.
Employment ID is a number that is relevant to Revenue and is generally 1 for all existing employees. You will rarely need to update this. Employment 1 indicates to Revenue that this is the primary employment of that individual.
Click on +New role or Edit employment if you wish to make an amendment.
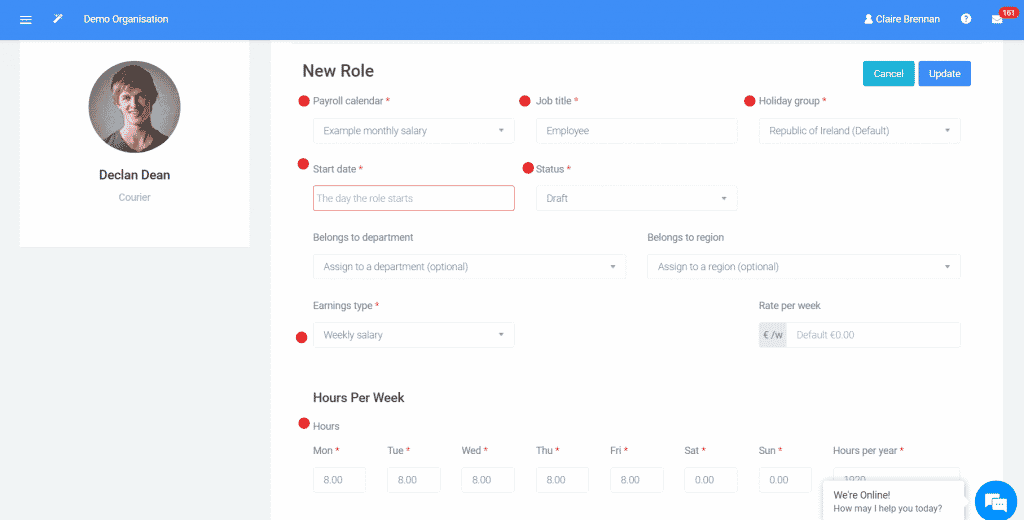
The employee’s Role contains the information that feeds directly to the payslip template and pay run.
Select the relevant payroll calendar. (If you need to revisit the calendar go to the wizard wand on the top bar > set up organisation > payroll calendars tab.)
Fill in the Job Title and Holiday group.
Input the start date – if it is unknown and not in the current year you can enter 31st Dec of the previous year. If the start date is in the current year enter the correct date or the employee’s tax credits will be affected.
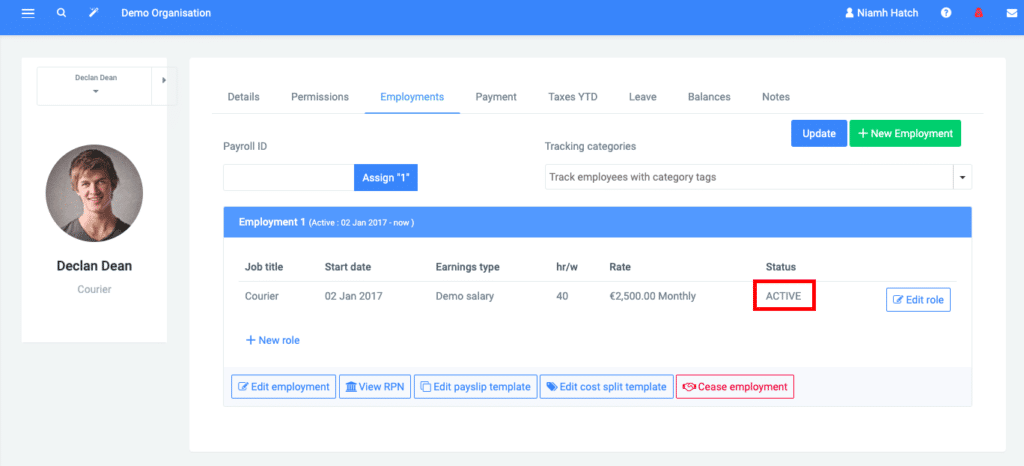
Change the Status from draft to active.
Assign Departments/Regions if you created them in the organisation setup.
Select the earnings type. Enter the amount; this will feed into the payslip in the pay run automatically.
Input the regular hours worked if known, otherwise enter zero for each day.
The information completed on the role page flows directly to the pay run and affects the employee’s leave entitlement so take the time to enter as many details on this screen as possible.
Payment Selection
If you intend to pay your employee via a SEPA file fill in the details on the Payment tab. If you are paying via individual direct debit; there is no need to complete this section.

Taxes YTD / Proprietary Director
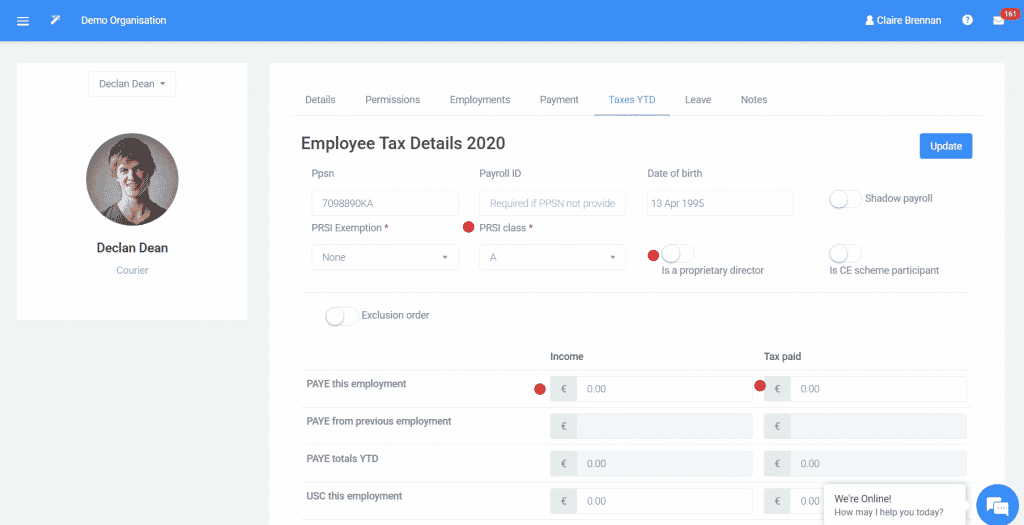
On the Taxes YTD Tab – update the exemptions if any (Company Directors are S Class – swipe across the button next to “is a proprietary director”)
Enter the Taxes YTD numbers if you are transferring from another payroll software part-way through the year. The numbers are as per the last payslip. You may be able to run a report from your previous software and upload it to Parolla. Take a look under Employees > Import Employees for options. Contact Parolla via the chat system and we can assist with this section or we can complete the task for a nominal fee.
Do not complete the taxes YTD section if it is the first pay run of the year or the first pay run for a new company.
Leave
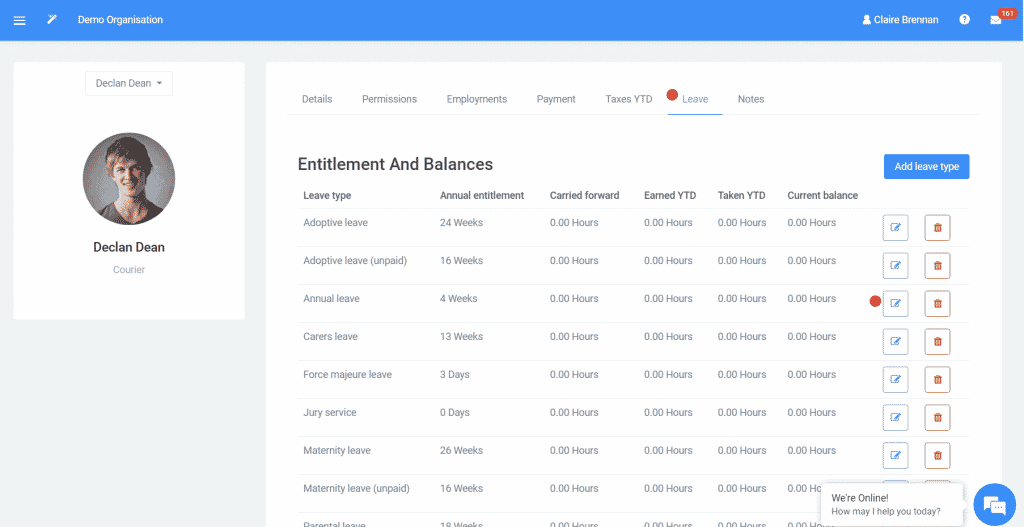
The Leave tab indicates the leave types available and should be zero for new employees. Please refer to the Annual Leave guide for further information.
Notes
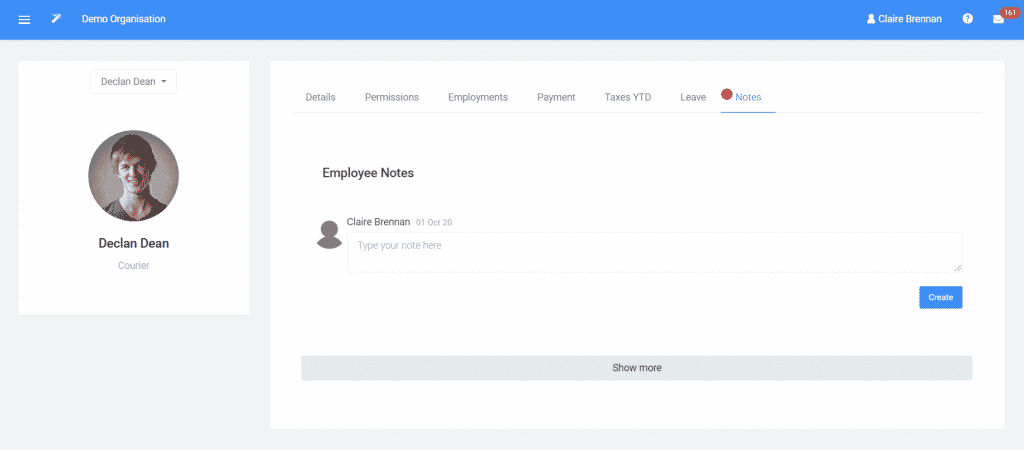
In the Notes tab, you may wish to add payroll-related items to an employee’s profile.
User Tips
To transfer quickly through employees, click on the arrow down or across key next to the person’s name.
Common Problems when creating Employee profiles
The new employee doesn’t appear on the pay run.
This could be one of 2 issues
- The status must be active for the employee to appear on the pay run.
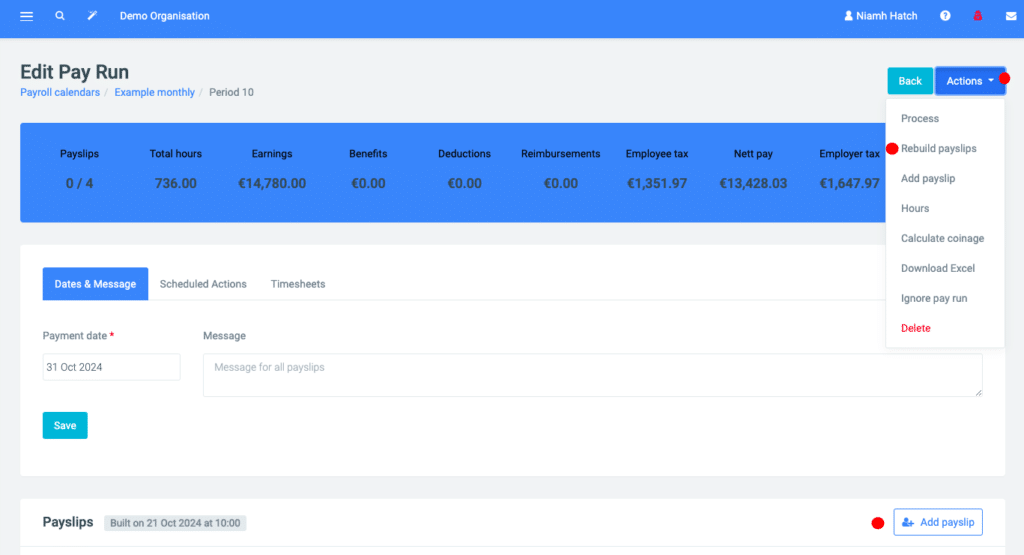
- To add a new employee to the already opened/built pay run either Rebuild payslips or click on the add employee button as per below.
