How Can We Help?
Mapping Charts of Accounts
Purpose
The guide takes you through the process of mapping your chart of accounts between Parolla and an accounting system. This allows us to allocate liabilities and expenses into the correct accounts to suit your reporting preferences.
We also have a selection of rules that you can apply to customise your setup.
You should already have connected the two systems. Read this guide here if you haven’t done so.
Mapping Charts of Accounts
We have a video tutorial on mapping charts of accounts here.
Background
Most modern accounting systems operate a double-entry book-keeping method with a range of control accounts.
When we create a payslip it contains a range of individual monetary transactions.
When we send those monetary transactions, as a bill or manual journal, we create both a credit and debit line for each transaction. The first line increases the relevant liability account. The second line increases the relevant expense account.
So a payslip will increase the accounts payable account by the net amount due to the employee. It will also increase the tax liability account that you have nominated. At that same time, we will increase the wages and salaries expense account and the taxes expense account.
When you reconcile the money paid out to the employee from your bank account, the Xero accounts payable account will reduce by the amount paid. Leaving just the wages and salaries expense, tax expense, and tax liability.
Later the next month when you pay the government the tax owed, you reconcile that against the taxes liability account. Leaving just the wages and salaries expense and the tax expense.
Both of the liabilities have been cleared by the payments to the employee and the tax collector.
For the two systems to work, it is essential that the Parolla accounts are mapped correctly to the Xero accounts.
Initial Mapping of Accounts
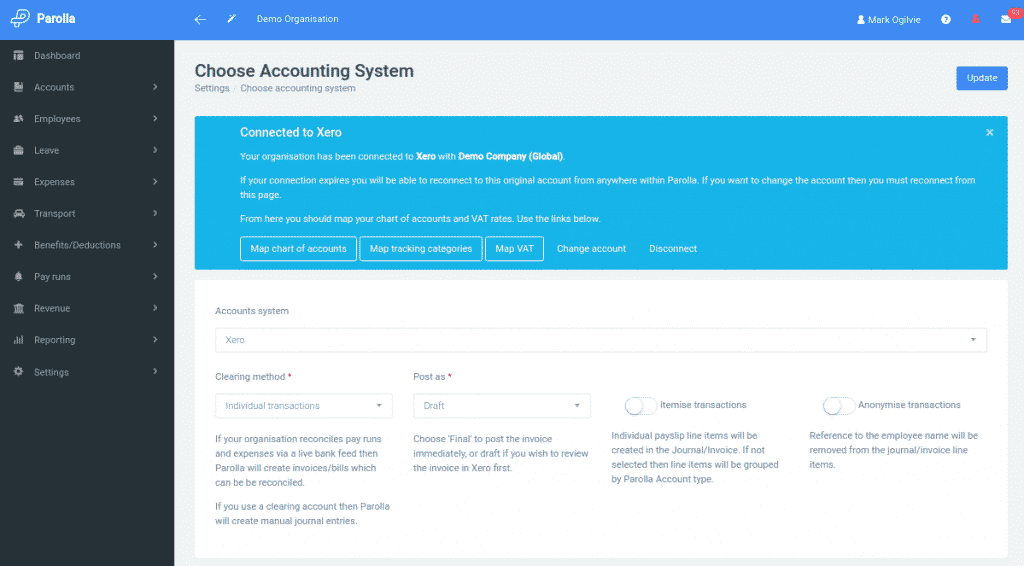
Once you have successfully connected to your accounting system you will be redirected back to Parolla. A successful connection will now display a blue message box containing follow on actions.

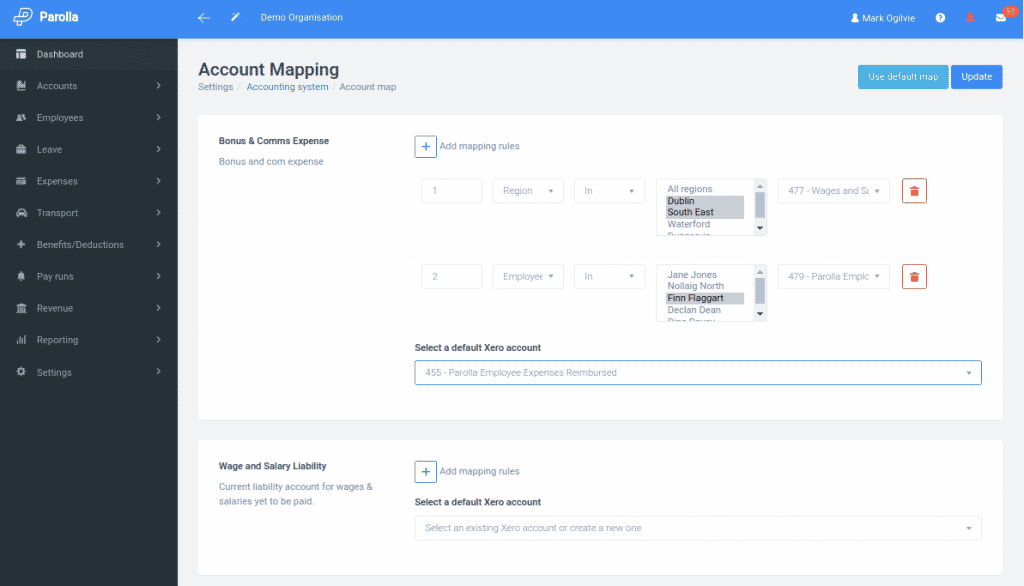
For the moment we are going to click on the Map chart of accounts button. This will take you to the mapping page below. You can also get to the same page via the left-hand menu under Settings > Accounts and click on the button for mappings.

The Parolla accounts and descriptions are shown on the left-hand side of each panel. On the right-hand side is a selection box for the default account you want to map to.
You can also add individual rules to each mapping. So in the image above, we have added the first rule that payslips with a Bonus and Comms Expense from an employee in the Region of Dublin or South East will be mapped to the account code 477.
The second rule states that a bonus and comms expense from Employee Finn Flaggart should be mapped to account code 479.
Any other bonus and comms expense should be mapped to the default account of 455.
You must map all Parolla accounts at this stage, even if you are not using all of them.
The next step is Mapping Categories.
Common Issues
I can’t map to the Xero Wages Payable Account
The default account in Xero for wages payable is a locked system account. Xero uses that account for its own payroll but third parties cannot post into it.
In our default setup, we create an account called Parolla Payable to post liabilities against. You can of course map your liabilities to any other current liability account you have in Xero.
I can’t find my Xero liability account in the mapping drop-down options
In Xero, liability accounts can be either Current Liability or Non-Current Liability.
We filter the chart of accounts from Xero and display Current Liability accounts, as these should only contain liabilities due in the next 12 months.
Payroll items should not be posted in non-current liability accounts.