How Can We Help?
Xero Integration
Purpose
This guide will help you connect your Parolla online payroll software with Xero, so that you can send pay run information to your Xero accounts software.
Authorising a Xero connection
We have a video tutorial on connecting to Xero here.
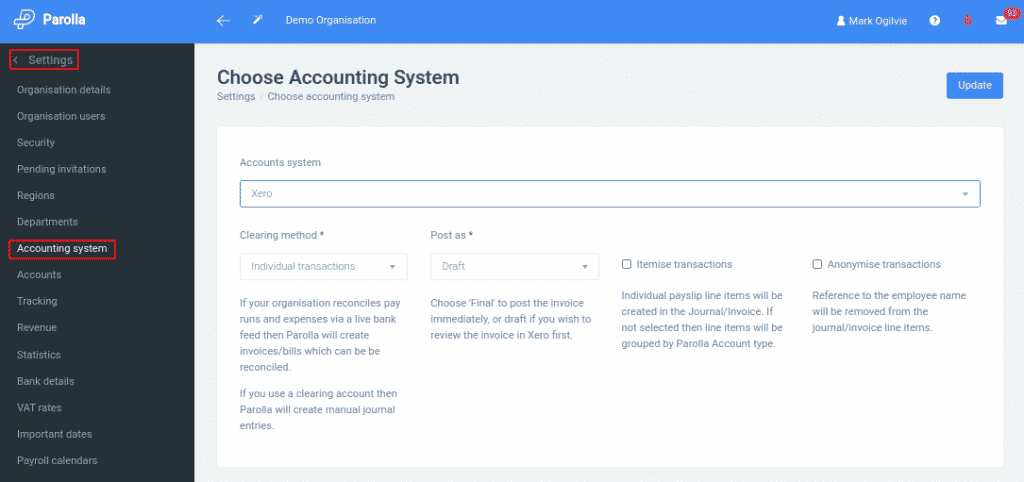
To initiate a connection, go to your Parolla settings menu and choose Accounts system.

Choose Xero as the accounts system, then select the options that you would like to post under.
Clearing Method
There are two methods of posting the payslips to Xero.
- Accounts payable invoice
- Clearing account (manual journal)
An accounts payable invoice will create a bill for the employee, to the value of the net pay amount. The bill contains liabilities and expenses line items that are mapped to the Xero chart of accounts including tax liabilities owed to the government.
The clearing account method creates a single manual journal containing all expenses and liabilities.
Post Method
You can choose to post the information to Xero as a draft item, or as a finalised bill/journal. The difference is that a draft item needs to be approved directly in Xero before it will appear on your accounts, whereas a finalised item removes this step.
We recommend that you initially post as a draft. Just until you’re familiar with how the two systems interact. The benefit of posting in draft is that you can delete the bill/journal in Xero, removing all traces of the information. Whereas an approved item can only be voided.
Itemise Transactions
When itemise transactions is turned on we will post every pay element and tax as its own line item in Xero. This allows detailed review from within Xero.
However, this does create a lot of line items that you may never need to see. If you turn this off then we will group the payslip elements according to their account and category tag.
Anonymise Transactions
This option will remove employee names from the postings. Use this if you want to obscure pay details from people who might have access to the Xero account.
Note that if you’re clearing with the accounts payable invoice option then the payee contact details must be shown.
Approving Access to Xero
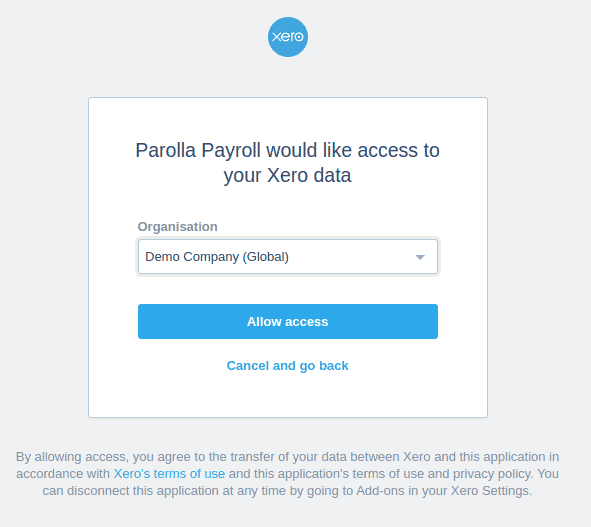
Once you have selected your options and clicked on update, we will transfer you to the Xero login and approval page.

Choose the company you want to pair with, and click on Allow access. Xero will then redirect you back to Parolla.
The next step is to map your chart of accounts.
Common Issues
Dropped Connections
Xero occasionally requires you to reconnect to the system. This is expected behaviour to get you to re-authenticate the connection.
Parolla will redirect you to the Account System page if there is a dropped connection between the two systems. You can then re-authenticate.
You do not need to change any of the settings, or re-map the accounts.
Insufficient Permissions
You must have Xero permissions in the target organisation of Adviser (or above) in order to authorise a connection to our software.